Insulation piercing connector installation
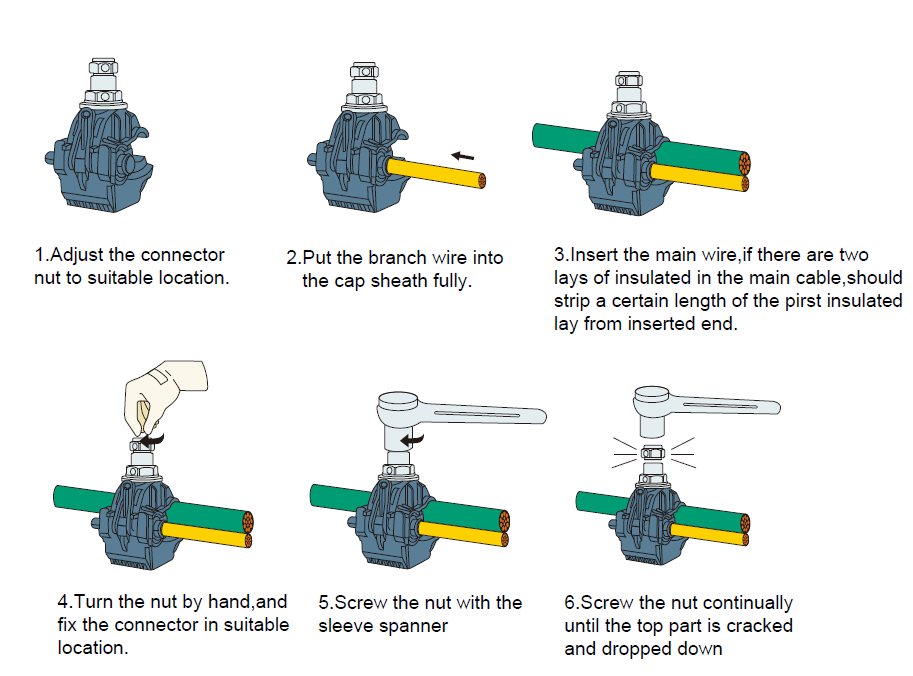
Single screw insulation piercing clamp Installation
- Adjust the nut of the puncture line clamp to a proper position, and insert the branch line into the branch line cap cover.
- Insert the main line. If the main line has two layers of insulation, a certain length of outer insulation should be stripped at the connection position.
- Put the main and branch lines in the proper position and keep them parallel. First, tighten the nut by hand to fix the clamp.
- Tighten the nuts evenly with a sleeve wrench of the corresponding size until the top breaks off and the installation is complete.
Single screw installation piercing connector Installation diagram
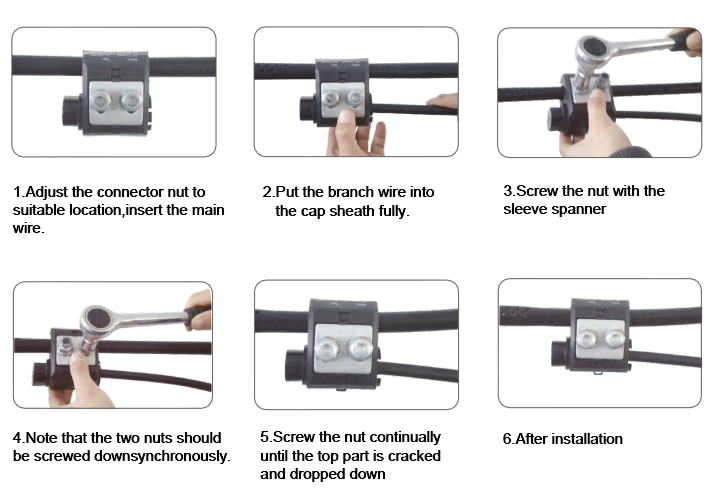
Twin screw insulation piercing connector installation
- First unscrew the wire clamp and insert the main wire into the main wire groove. Do not twist the main wire with the knife ruler. Note whether the wire diameter range corresponds to this wire clamp.
- Put the branch line into the branch line slot. Note the same as above.
- Tighten with a socket wrench. Disable open-end wrenches.
- Note that the two nuts should be screwed down synchronously in sequence.
- When tightened to a certain strength, the constant torque nut is broken and the installation is completed.
Twin screw installation piercing connector Installation diagram